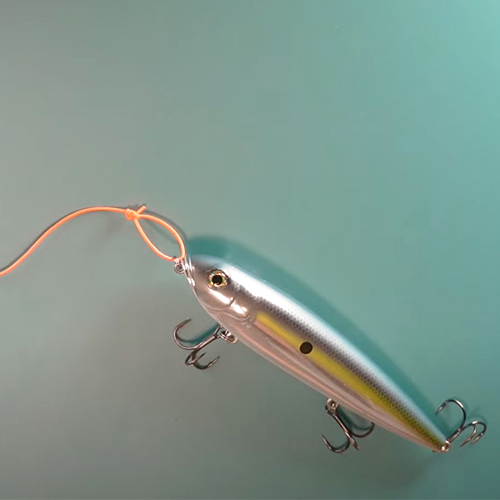
Fishing Rigs
Fishing rigs are the combination of hooks, sinkers, snaps and swivels that you add to the end of your fishing line. You can also add a bobber or cork, or in some cases, a second hook.
Types of Fishing Rigs
Whether working on a fishing pole setup for beginners or needing to know how to set up a fishing rod for lake fishing, learning which rigs work best for the environment and conditions is an essential part of learning how to fish.
Each type of rig has a different purpose, and some rigs may have several names. Other rigs work well for specific species and are referred to as bass rigs, flounder rigs or catfish rigs. You can also learn how to set up fishing rigs that can be used for multiple species. To get started, grab your rod and reel, some extra line and a variety of hooks, sinkers, and swivels. If you’re not familiar with your options in this department, check out our terminal tackle page for more details.
Tip: To create the rigs below, you will need to attach your terminal tackle using fishing knots. A standard fishing knot like the improved clinch knot or the uni knot will work.
Standard Rigs & Specialty Rigs
First things first, there is more to creating fishing rigs than knowing how to put a sinker on a fishing line. But just because you can tie a lot of different things to a line, doesn't mean that making a fishing rig should be complicated. Most standard rigs are designed rather simply and are used for specific fishing techniques.
1. Basic Bobber Rig
For still fishing, beginner anglers should try the basic bobber rig. These are very simple rigs, and the bobber will show you when a fish is biting your bait. This rig can be used when fishing for panfish, crappie, perch or any other small fish. Follow these steps to make a basic bobber rig:
- Tie a hook on the end of your fishing line with one of your fishing knots.
- Pinch one or two small split shot sinkers to your main line about 6-12 inches from the hook to add a bit of weight to your line (this will keep your bait suspended vertically). If there is current, you can add one or two more split shots.
- Finally, clip a circle bobber to the rig at least 3-4 feet above the hook. Where you place the bobber can vary depending on the depth of the water but remember not to make it too long or it will be difficult to cast.
- Tip: A cork bobber can be used on a basic bobber rig as well. But remember to slide it on your line before you tie your hook.
2. Sliding Sinker Rig
For bottom fishing, anglers should try the sliding sinker bottom rig also known as the Carolina rig or Fishdinder rig. It is a popular, versatile rig and is an effective way to fish bait off the bottom, both from shore and while drifting in a boat. These fishing rigs can be used as catfish rigs, flounder rigs, trout rigs or for fishing for redfish or striped bass.
The presentation of the rig allows the sinker to rest on the bottom of the river or in the surf with the bait suspended above. This feature prevents the fish from feeling the weight as the line passes through the sinker and keeps it from getting hung up on rocks or weeds.
Follow these steps to make a sliding sinker rig:
- Start by threading the main line through the hole in an egg sinker.
- Tie a swivel to the end of your main line using one of your fishing knots, so it stops the sinker from falling off.
- Attach a 6- to 12-inch piece of leader to the swivel.
- On the end of the leader, add your hook or artificial bait like a soft plastic or a jig.
3. 3-Way Fishing Rig
Another rig that works for bottom fishing is the 3-way rig (it can also be used when fishing from shore in current). These rigs are typically considered catfish rigs and is frequently used in surf fishing as well. They are designed to keep your bait off the bottom by using a 3-way swivel. The idea is that when the three-way fishing rig is dropped, drifted or trolled, the lure or bait on the longer piece of leader hovers just over the bottom.
Follow these steps to make a 3-way rig:
- Start with tying a three-way swivel to your main line. Then tie a short piece of leader (or cut fishing line) to one of the swivel eyes using one of your fishing knots.
- Then tie a longer piece of fishing line to the other eye.
- To the shorter piece of leader, add a sinker (pyramid sinkers work best but other shapes work too).
- To the longer piece of leader, tie your hook or lure.
4. Two-Hook Bottom Rigs
A two-hook bottom rig also know as spreader rigs is probably the most versatile of all fishing rigs. Two-hook bottom rigs can be used as flounder rigs or really to catch everything from panfish to giant grouper. This rig is commonly pre-made and sold at tackle shops, but you can tie your own. If you choose to purchase, you will notice that the rigs made with spreader bars instead of fishing line, this can help prevent your hooks from getting tangled.
Follow these steps to make a two-hook bottom rig for smaller fish:
- Start with an arm's length of 30- to 50-pound monofilament fishing line as a leader. Tie four 2- to 3-inch dropper loop knots 3 to 4 inches apart.
- Attach a sinker to the bottom loop using one of your fishing knots. Tie a hook to each of the two middle loops.
- Lastly, tie your main line (or the line running from your fishing reel) to the top loop.
How to make a two-hook bottom rig for larger fish:
- Use 50- to 100-pound fishing line (any type) for leader, a snap swivel, two three-way swivels and a regular swivel. Add the snap swivel to your main line.
- Tie a 6- to 8-inch piece of leader to the snap swivel using one of the fishing knots. Tie a three-way swivel to the end of the abovementioned leader.
- Attach an 8- to 10-inch piece of leader to another eye on the three-way swivel mentioned above. Tie the second three-way swivel to the end of the 8- to 10-inch leader.
- Attach another 6- to 8-inch piece of leader to the second eye of the second three-way. From each of the remaining eyes on the three-way swivels, tie a short piece of leader snelled to a hook (see snelled knots for instructions).
- Make sure the leaders are short enough that the hooks don't become tangled. You can also add bucktail hair, beads, spinners or floats to the hooks to attract fish.
Tip: When using two-hook bottom rigs as flounder rigs, consider adding a spinner blade or beads for flash to help attract the fish.
5. Popping Cork Fishing Rigs
A popping cork is a fishing rig that preys on a fish's keen sense of sound and features a piece of terminal tackle called a popping cork. A popping cork can be purchased at most tackle retailers and is made up of a short piece of stiff wire threaded through a foam or cork float and a couple of metal or plastic beads. These are some of the best fishing rigs for redfish or they can be used as trout rigs for speckled trout.
Follow these steps to create a popping cork rig:
- Tie one end of the popping cork to your main fishing line using a loop knot.
- At the other end of the wire extending from the popping cork, tie a piece of leader 3-4 feet long or long enough to dangle a jig or natural saltwater bait just over the bottom.
- A quick snap of the rod tip makes the float pop against the beads and causes the bait to hop below. Let the float settle before popping it again. This rig works best where shrimp or baitfish are active on the surface.
6. Sabiki Rigs: Specialty Fishing Rigs
Some rigs are slightly more specialized and are used for specific situations like catching bait. Here is one to know:
Sabiki Rigs are designed to catch baitfish and consist of multiple tiny hooks. These tiny hooks are then rigged with feathers, foil, or tiny pieces of natural bait. Baitfish feed on plankton, so a Sabiki Rig should imitate this tiny baitfish food and easily fit into their modest mouths.
Sabiki Rigs often come pre-made with 4-10 hooks and can be purchased at most tackle shops. While you can make your own, they are relatively inexpensive, and are difficult to keep untangled when stored.
Whether you are creating Sabiki Rigs, catfish rigs, trout rigs, or any other rigs, make sure you secure all your terminal tackle tightly to ensure the rig does not come loose when you have fish on the end of your line.
- Cut 24-inches of line and tie four dropper loop knots evenly spaced along the length of line.
- Attached a barrel swivel to the top of the line using an improved clinch knot.
- Attached each branch line (snelled hooks with flash or feathers) to your main line using a loop-to-loop connection.
- Attached a sinker to the terminal end of your line using an improved clinch knot.
Now that you know how to set up fishing rigs, you are ready to begin casting. Learn more.
KEEP LEARNING
How to Tie the Non-Slip Loop Knot
The non-slip loop knot is a popular and reliable choice for securing hooks, lures, and other tackle to your fishing line.
LEARN MORE
Socials
Take me fishing social media links
LEARN MORE

TakeMeFishing x Teen Vogue
Join us on a creative journey as fashion designer Ahmrii Johnson walks us through her collaborative vision and process with Teen Vogue and fashion brand, Rentrayage, to create a special piece.
LEARN MORE
.png?lang=en-US&ext=.png)